22 December 2013

Inspired by... Chalkboard Nails!

Hi guys!

Today I have a manicure that was inspired by one and only Sarah behind the Chalkboard Nails blog, which you can see here. Shes very talented and she has been inspiring me ever since I started this nail journey.
A few weeks ago she did an amazing distressed nail art design that I just had to try myself. 
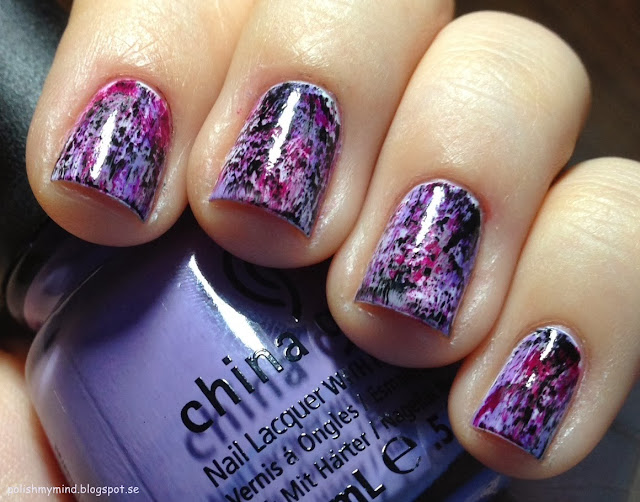
Here is the result:


This technique is really easy and Sarah did a great tutorial so you shouldnt have any problem with this technique. I started off with a white base - Essie Blanc, then added colors like China Glaze Tart-y for The Party, KICKS Philosophy and OPI Casino Royale. In the end I used Orly Liquid Vinyl to create the distress design.


I loved this mani, the design is really easy and yet so effective! 

Thank you for stopping by! :) xx

*All of the nail polish I own I bought with my own money or received as a gift from friends, I don't get paid for any reviews, it's just my own thoughts.


20 December 2013

Decorate your Helmer - tutorial.

Hello there lovelies!

Yeah, its been a while again but I do have something special for those of you who would like to personalize your Helmer/-s. A Helmer is a popular nail polish storage (not only for nail polish!) unit that you can buy at Ikea. Its rather affordable and it keeps your beauties in check.

Today I want to show you a tutorial for decorating it. This is just one of the ways you can do it but this is the one I wanted to do, so here you go :) Now, many of you may already seen something similar on the Internet but for those of you who didnt and those that need some help with how to, here it comes:


You will need: scrap booking paper of your choice (I chose rather thick one with busy design but you can pick whatever you like), scissors or cutting knife, double sided tape to glue the paper to the drawers and a ruler.

Step 1:
Choose the exact "part" of the scrap booking paper sheet that you want to have on a specific drawer - this step is optional for those of you who have a paper that has the same pattern all over it and the placement of the sheet on the drawer front wont matter. My paper has different designs in different places on the sheet.


Step 2:
Either measure the drawers front or like me just put them on the back of the paper and mark how big the piece should be. Think about that the size must be big enough to cover all of it and not show any "naked spots". Cut the paper into the right sized pieces, mark where the screws will be and make holes for them. BE CAREFUL with making holes in the paper, you dont want the holes to be too big or the paper to break! Here is how it should look after step 2 is completed:


Step 3:
Glue the double sided tape on all of the edges of the drawers front. I chose to do this all the way cause I didnt want any corners to lift:


Step 4:
Glue the paper piece to the drawer. If your paper is a bit thicker and you have made a mistake, you can just pull the piece off and do it again, the tape wont damage the sheet:


Step 5:
Assemble the handle to the drawers front, then the front to the rest of the drawer. (drawer,rawer,rawrrrr.. Can you see Ive written this word way too many times?) 


Step 6:
Repeat step 2 - 5 with the rest of the drawers. My final product looks like this, yours should look similar:


And its done! :)

So... My first tutorial ever. Its been a lot of work with both, the Helmer and the tutorial but its totally worth it. I will be really happy if my tutorial helps someone to personalize their own Helmer. Another good thing with doing this is that whichever design of the paper you choose, it will make the whole thing look much better and you can take the colors matching the color palette of the room the Helmer stands in. 

Let me know if theres anything I should think of in future when I will be writing more tutorials and if you enjoyed it :)

Thank you for stopping by! :) xx 


2 December 2013

H&M newest gems - my picks.

Hey there!

How have you been? Today is Monday but thanks God Im free, had time to play some with my new Moyou plate and do some more nail art :)

Anyways, lately in the H&M stores appeared new nail polish shades from their own line and I have swatches for you:


First we have my personal favorite: H&M Black/White Glitter.


The name is not very fancy but hell, who cares :) As you can see Black/White Glitter is a glitter topper with black micro glitter, small and medium hexes in black and white + white bar glitter. Normally Im not a fan of a bar glitter but the amounts of it here its really not that bad. I actually think this polish would be boring without them. The shade is rather dense, you can see only one coat in my swatches. I love it over bright, summery colors. 


The second and last of my picks is H&M 3D Glitter.


3D Glitter is a flake topper in a clear (it looks milky but it is clear) base. I was very excited when I saw it in the store but couldnt be more disappointed when I came home and swatched it. The flakes are really big and stubborn. They are also hard so they stick out on your nail. The name 3D Glitter suits this one well. It was also hard to fish out any glitter pieces so yeah... Very disappointed.


I guess I cant complain. H&M has tendency to hit & miss their shades so I was prepared for those shades to be miss. I definitely recommend the black and white glitter, its very pretty.

Thank you for stopping by! :) xx

*All of the nail polish I own I bought with my own money or received as a gift from friends, I don't get paid for any reviews, it's just my own thoughts.


26 November 2013

Inspired by..


Hello there lovelies!

Todays post features a look that was inspired by very talented Nicole that is behind the amazing blog Kiss on the Chic. If you dont already follow her, you totally should! Here is also her Instagram if you want to drool over her skills some more :)

Anyways.. This technique was the one I wanted to try since I first saw a picture of it on the internet. I thought Id not do any good when I actually sat and got to it but I was so wrong. This is really easy and you cant do anything wrong! Lovely!


My mani is nothing compared to Nicoles (which you can see here) but I still like it. Its beautiful in its simplicity.


On my index and pinky finger I used 2 coats of Wet n Wild I Need a Refresh-Mint. Base on my ring finger is Greta by Make Up Store and on my middle finger is Essie Blanc. Flowers are made by all of the polishes I named + Orly Liquid Vinyl.

I really enjoyed this manicure :) And thank you Nicole for being the non-stop inspiration for me! 

Thank you for stopping by! :) xx

*All of the nail polish I own I bought with my own money or received as a gift from friends, I don't get paid for any reviews, it's just my own thoughts.

19 November 2013

Galaxy.. Again?!

Hey there!

Wow, it feels like its been a while. My cats has been to the vet and since then they havent been themselves so now I have to take care of them extra much. It means I basically have no time to do anything by myself anymore but who cares, the babies needs their mommy.

Yes, its another galaxy manicure, Ill not stop until I master this art. Every single time I do galaxy nails I think I could have done a better job. The perfectionist in me doesnt allow any randomness and I struggle with the nebula every time. They should be more random but its too hard! Anyways, no more rambling! Here it is:


I think the color combo is amazing, its not your regular galaxy but I love it nonetheless :) 
My base is Marina by Gina Tricot. The nebula is done with Essie Wheres My Chauffeur and Shimmer Mint by Gina Tricot followed by a thin coat of OPI Servin' Up Sparkle.


I definitely must work on my randomness but I still like the mani. How about you?

Thank you for stopping by! :) xx

*All of the nail polish I own I bought with my own money or received as a gift from friends, I don't get paid for any reviews, it's just my own thoughts.

14 November 2013

Splattery gradient.

Hey there!

Yes! I finally found some time to blog a little bit! Today I have to show you a mani that I adored - and got many compliments on :)


I started off with a gradient done with 3 OPI shades: My Vampire Is Buff, My Very First Knockwurst and A Butterfly Moment. When this was done I added a little bit of splatter onto my nails with Orly Liquid Vinyl.


What do you think about this one? You think this mani would pass as a "work-friendly?" 

Thank you for stopping by! :) xx

*All of the nail polish I own I bought with my own money or received as a gift from friends, I don't get paid for any reviews, it's just my own thoughts.

10 November 2013

H&M Did I Tell You? - Swatches and review.

Hey there!

Today I have for you a little gem that made its way into my stash a while ago. Its exactly what I was looking for :) Recently H&M came up with a gorgeous idea of changing brushes in their line of nail polishes into much wider ones. Score! Their brushes were terrible! Onto the swatch then:


As you can see Did I Tell You? is a glitter topper. Clear base packed with small and medium sized hexes in rather dark blue shade (the swatches show the glitter a bit too bright) but believe me, its absolutely stunning!


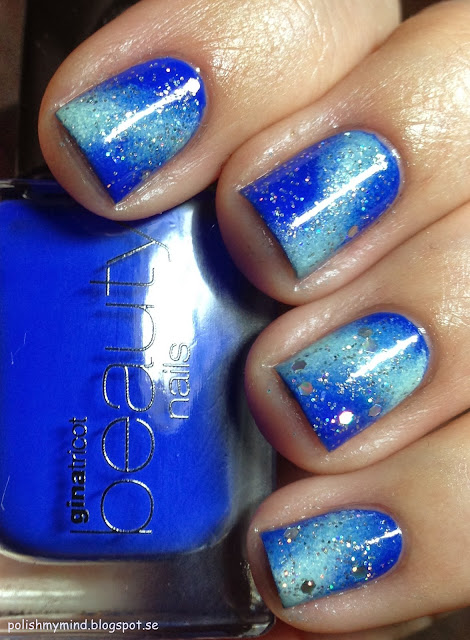
I was afraid that the glitters wont come out of the bottle easily but I was wrong. Application is amazing! This is rather thicker coat of Did I Tell You? over a simple white to light blue gradient.

I also couldnt help myself and added a coat of a matte top coat.. Yummy!


I can really recommend this shade to anybody, its stunning and rather inexpensive.

Thank you for stopping by! :) xx

*All of the nail polish I own I bought with my own money or received as a gift from friends, I don't get paid for any reviews, it's just my own thoughts. 

7 November 2013

Rose fail.. Or is it?

Hey!

Todays quick post is all about a nail art that was inspired by a ton of beautiful, similar designs. Too bad that I failed when I tried to recreate it. Oh well..


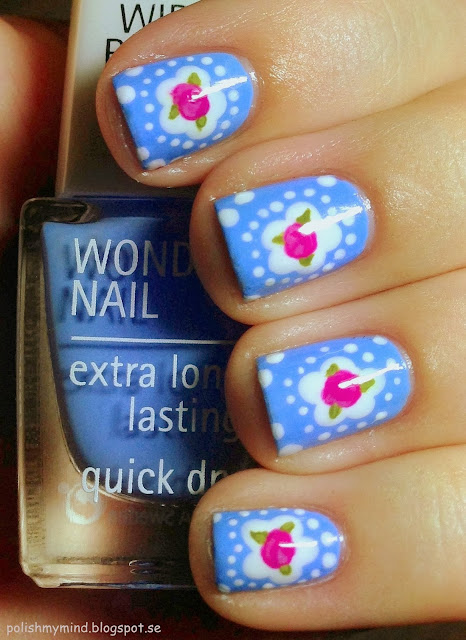
For this design I used Scuba Blue by IsaDora as my base and bunch of acrylic paints for the art. 


I dont know how to feel about these... they should definitely come out better. What do you think?

Thank you for stopping by! :) xx

*All of the nail polish I own I bought with my own money or received as a gift from friends, I don't get paid for any reviews, it's just my own thoughts.

5 November 2013

Holo ombre once again!

Hey lovelies!

How are all of you today? I have for you something special. I loved the holo mani I did for Breast Cancer Awareness week which you can see here, so I recreated it with a few different colors.


As before, I used shades from 2012 Depend Holographic Collection. From left to right, the polishes are: #2030 Plum, #2031 Lavender, #2032 Denim Blue and #2033 Ocean Blue.


What do you think of this mani? I think Depends Holographic Collection is very nice consider their holo is visible enough + they stay pretty in shade!

Thank you for stopping by! :) xx

*All of the nail polish I own I bought with my own money or received as a gift from friends, I don't get paid for any reviews, it's just my own thoughts. 

3 November 2013

Black Diamond by KICKS Make Up - swatches and review.

Hello there!

Its been a while since I showed you any swatches and a good shade to come back to it is one of my top 10 favorite nail polishes ever. You may wonder why is this particular shade so special? Let me show you:


This beauty is a texture shade and its called Black Diamond, how fitting :) Its a dark plum purple base with golden and pink particulates. Absolutely stunning! When left to dry to its texture finish its looks like there is even dark purple or maybe even black particulates in there as well. 


The formula is amazing, not too thin so it doesnt ruin your cuticles. This is 2 coats + one very thin coat for give the depth I like. Drying time is rather fast for a texture polish.


I couldnt help myself and I put top coat on it and OH MY this is gorgeous! Look at that:


I had to alter with the pictures a bit to show you the true shade this polish has with top coat (every time I tried to take a picture, the polish came off way too dark). If you dont think its a stunner I dont know what is.


Now you see why Black Diamond by KICKS is one of my top 10 polishes ever. But what about you? Do you like it?

Thank you for stopping by! :) xx

*All of the nail polish I own I bought with my own money or received as a gift from friends, I don't get paid for any reviews, it's just my own thoughts.

1 November 2013

A little bit of black.

Hey lovelies!

Todays post was suppose to be a post about my Halloween mani but an accident happened. I broke my nail. I had to cut my nails into ultra nubbins and now I have to recreate my mani cause I didnt take any pictures. So instead of make you wait even longer Im gonna show you something else I had on my nails a while back.


Ive done a gradient using Color Club Take Me To Your Chateau, IsaDora Lilac Bikini and Orly Liquid Vinyl, followed by a thin coat of Black Polka Dots by Nubar.


What do you think ladies? I really enjoyed this mani :)

Thank you for stopping by! :) xx

*All of the nail polish I own I bought with my own money or received as a gift from friends, I don't get paid for any reviews, it's just my own thoughts.


19 October 2013

United In Pink - part 3.

Hello my lovely readers!


Today I have for you yet another manicure that is all about pink. Im not sure if you have noticed but I dont own so many pinks but Ive found some holographic pinks & pink-ish shades in my stash. Let me show you:


All the shades are from 2012 Depend Holographic Collection. I used (left to right): #2027 Raspberry, #2029 Charm Pink, #2030 Plum and #2031 Lavender. This is so beautiful, I wish it was sunny so that I could flash my nails into peoples faces and go "YOU SEE? YOU SEE HOW PRETTY THEY ARE?!"


 Here is a bonus out-of-focus picture for your pleasure:


Thank you for stopping by! :) xx

*All of the nail polish I own I bought with my own money or received as a gift from friends, I don't get paid for any reviews, it's just my own thoughts.


17 October 2013

United In Pink - take two.

Hey ladies!

How are you doing today? Im enjoying a bit of free time and of course doing my nails ^^


Today I have for you mani nr 2 in the United In Pink series. I decided to go for a splatter, its been a while since I did that and it never seem to go wrong. I must say that the mani came out way better than I thought it would consider I did splatter on a black base. Wanna see?


Now let me explain the out-of-order finger pose (hence my index finger). I couldnt get the nails lined up in the same position to get the pictures I wanted. I hate those big, square, chunky H&M bottles. I cant pose with them. The size of my hand isnt really helping. Well at least the new shades have a new bottle which is much easier to pose with.  For me at least. Talk about a big problem for a nail blogger ;)


My base is Orly Liquid Vinyl. I stamped my ring finger with a design from Bundle Monster BM-321 with my LM nail polish that has no name, for the sake of my sanity lets call this one "lavender pink". The rest of the fingers are covered with splat done with LM "lavender pink", IsaDora Power Pink and H&M Dance With Me. What do you think?

Thank you for stopping by! :) xx

*All of the nail polish I own I bought with my own money or received as a gift from friends, I don't get paid for any reviews, it's just my own thoughts.


15 October 2013

United In Pink - my first try.


Hey pretties!

As many of you know October is a month that people are trying to raise awareness about breast cancer. Not only is it all about breast cancer but also about pregnancy and infant loss.

This week me and some other truly lovely ladies are going to do pink manicures, that will symbolize the cause.


So for my first of the "pink manicures" I did a pink leopard print.


Base for the print is a simple gradient using LM polish that has no name and Safari #18. The reverse dots were done with the same polishes. I outlined the print with a black striper.


What do you think about this mani? Is it too much for your taste? Let me know!

Here is a bonus picture that I took and posted on Instagram when I was in the middle of doing the mani:


Thank you for stopping by! :) xx

*All of the nail polish I own I bought with my own money or received as a gift from friends, I don't get paid for any reviews, it's just my own thoughts.


13 October 2013

Vintage roses, I think.

Hello there!

Todays post is all about vintage roses and yeah Im not sure if my mani is "vintage" enough but well.
Here it is: 


On my index and pinky finger I have a franken polish of my own creation. I mixed some of Casino Royale by OPI and a gold flaked polish together. I couldnt capture the gold sparkle in those photos for life but its pretty nonetheless. On my middle and ring finger I started off with a thick coat of Essie Blanc (that reminds me I have to buy a refill), then placed striping tape to get the look followed by one thick coat of my black unnamed polish. I did the roses with IsaDora Power Pink, OPI Casino Royale and the gold flaked polish. leaves are done with some acrylic paints.


How do you like this mani? 

Thank you for stopping by! :) xx

*All of the nail polish I own I bought with my own money or received as a gift from friends, I don't get paid for any reviews, it's just my own thoughts.


10 October 2013

Gradient, tape & texture.

Hello there lovelies!

WOW, its been a while. Life got in the blogs way and well a pause happened. 

Today I have to show you a mani that I wore to my best friends wedding. I didnt do anything delicate cause, come on, Im not so delicate myself :)


Let me tell you, this was TIME CONSUMING. It was worth it but boy, so long time it all took. My inspiration for the nails was my dress and my earrings. Here they are:


Here is what happened when I tried to take that shot:


This is one of my kitties, his name is Zigge. He loves when I put something on the couch, he always thinks its for him to lie down on :)

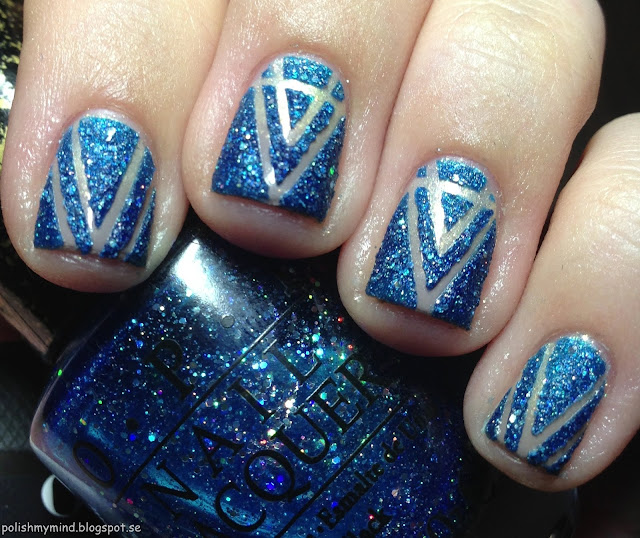
Anyways, I started off with a gradient with Nordic Cap NP06 and IsaDora Macchiato to match the earrings color, then taped off the "diamond shape" followed by 2 coats of OPI's Get your Number. 


How do you like this manicure?

Thank you for stopping by! :) xx

*All of the nail polish I own I bought with my own money or received as a gift from friends, I don't get paid for any reviews, it's just my own thoughts.